
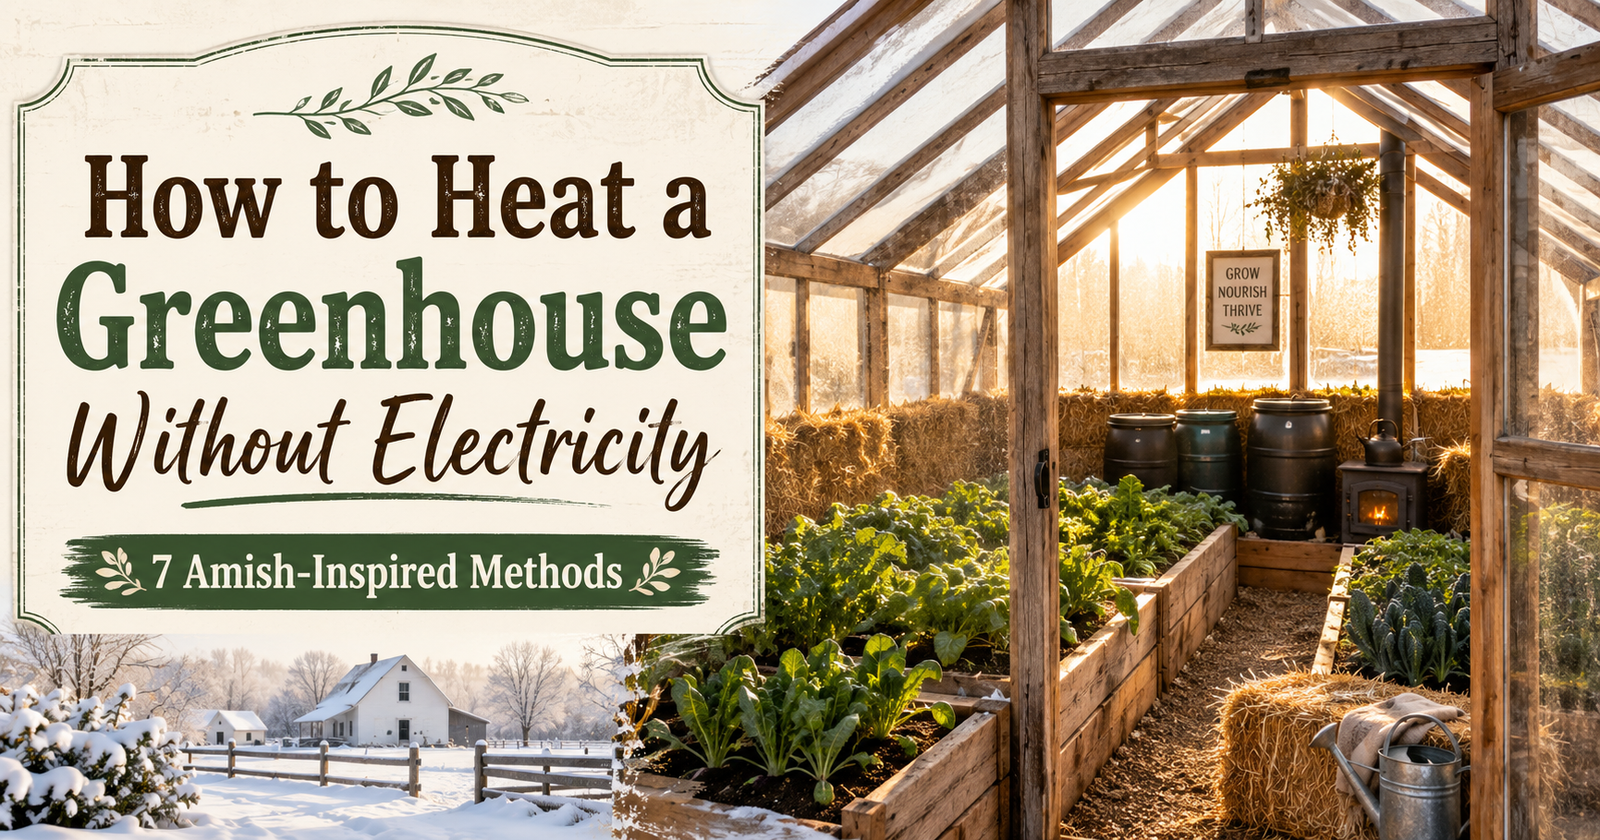
Heating a greenhouse through a Western New York winter can get expensive quickly. Even worse, an electric heater leaves your plants vulnerable if the power goes out during a snowstorm.
Thankfully, you do not necessarily need to keep an entire greenhouse warm like your living room.
Traditional farmers have long used sunlight, thermal mass, manure, compost, insulation, and other simple materials to protect cold-hardy crops. These low-tech methods are often associated with Amish farming, but they can be used on nearly any homestead.
The goal is not to turn your greenhouse into a tropical paradise in January. Instead, you are trying to:
- Capture as much daytime warmth as possible
- Slow down heat loss after sunset
- Protect plants from wind and hard freezes
- Keep the soil and root zone warmer
- Grow crops that can tolerate cold conditions
Here are seven ways to heat a greenhouse without electricity—or at least reduce how much additional heat it needs.
1. Use Passive Solar Heating
The sun is the most important free heat source available to a greenhouse.
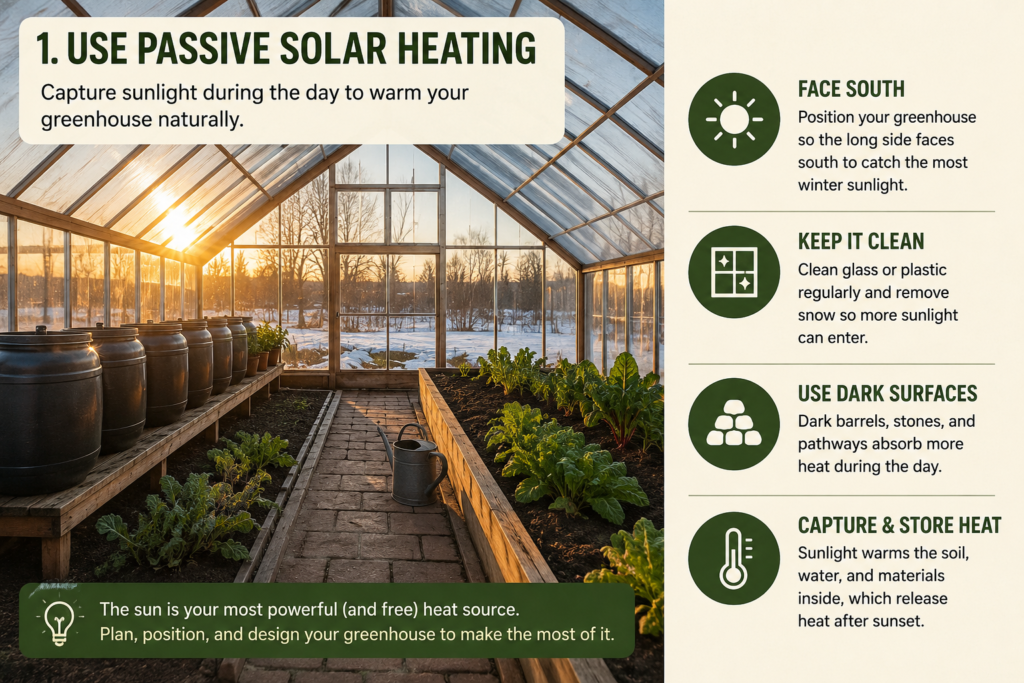
Passive solar heating simply means capturing and using sunlight without electric fans, heaters, or other powered equipment. During the day, sunlight passes through the greenhouse covering and warms the soil, containers, pathways, plants, and other objects inside.
Those materials then release some of the stored warmth after the sun goes down.
Face the greenhouse toward the south
If you are building a new greenhouse, cold house, or lean-to greenhouse, place it where it will receive the most winter sunlight.
In the Northern Hemisphere, a southern exposure generally receives the greatest amount of winter sun. Avoid placing the greenhouse directly north of a barn, house, evergreen tree, or other tall structure that will shade it during the short winter days.
Remember that the sun sits much lower in the sky during winter than it does in summer. A location that receives full sun in July may be shaded by November.
Keep the greenhouse covering clean
Dust, algae, leaves, and snow can dramatically reduce the amount of sunlight entering the greenhouse.
Clean glass or plastic before winter and remove heavy snow accumulation when it is safe to do so. Even a thin layer of snow can block much of the sunlight you are relying on for warmth.
Use dark surfaces carefully
Dark containers, stones, bricks, and pathways absorb more solar energy than pale surfaces. Placing dark materials where the winter sun can reach them may help capture additional warmth during the day.
Do not paint every surface black, however. Plants still need light, and covering transparent greenhouse walls would defeat the purpose. Concentrate heat-absorbing materials along the floor, back wall, or north side of the greenhouse.
2. Add Thermal Mass
Thermal mass is any material that absorbs heat when the greenhouse is warm and slowly releases it as temperatures fall.
Water is one of the easiest thermal-mass materials for a small homestead greenhouse.
Use water barrels
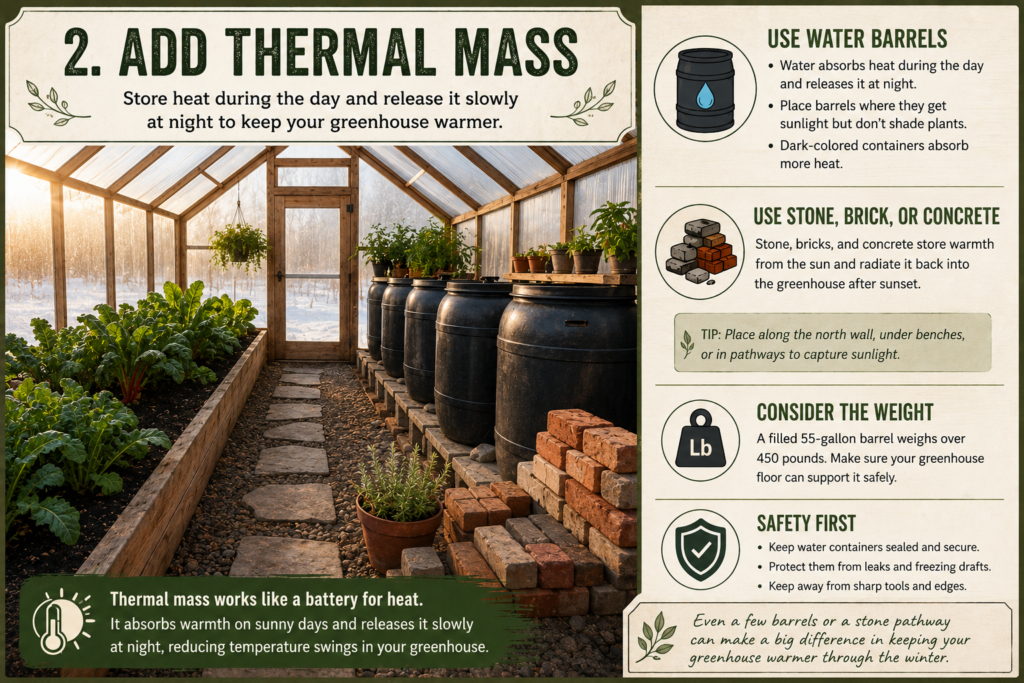
Large barrels, buckets, or jugs of water can collect warmth during sunny days and release it overnight.
Place the containers where they receive direct sunlight without shading your plants. The north wall is often a useful location because containers placed there will not block southern sunlight.
Dark containers absorb heat more efficiently, although any sealed container of water can provide some thermal mass.
Make sure your greenhouse floor can support the weight. A filled 55-gallon barrel weighs more than 450 pounds.
The containers should also be:
- Tightly covered
- Protected from leaking
- Positioned on a stable base
- Kept away from sharp tools and freezing drafts
Water barrels will not keep an unheated greenhouse warm through every severe cold spell. Their biggest benefit is slowing sudden temperature changes and delaying the nighttime temperature drop.
Use stone, brick, or concrete
Stone pathways, concrete blocks, bricks, and pavers can also act as thermal mass.
If you already have salvaged brick or stone on the homestead, you may be able to use it for:
- Greenhouse pathways
- Raised-bed borders
- A solid north wall
- Shelving supports
- The base beneath water containers
Position these materials where sunlight can reach them. A pile of bricks hidden under a shaded bench will not absorb nearly as much useful warmth.
3. Generate Heat With Compost
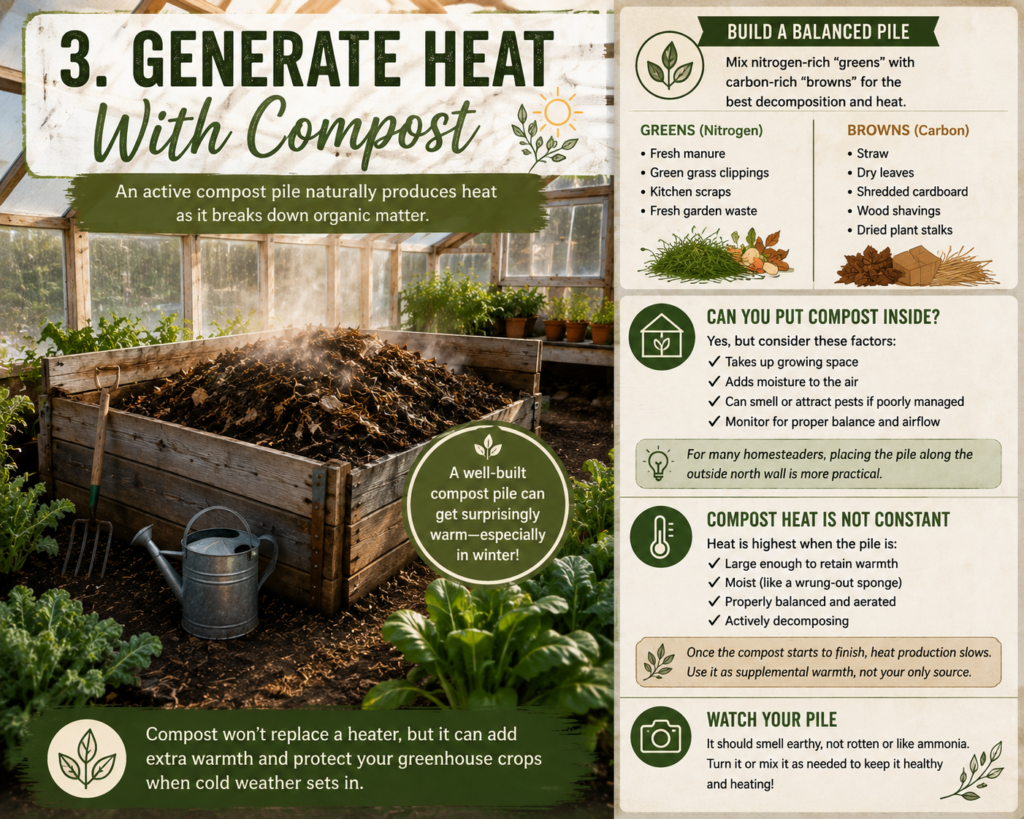
An actively decomposing compost pile produces heat as microorganisms break down organic material.
A properly built pile can become surprisingly warm, especially when it contains a balanced mixture of nitrogen-rich and carbon-rich materials.
Nitrogen-rich materials include:
- Fresh manure
- Green grass clippings
- Kitchen scraps
- Fresh garden waste
Carbon-rich materials include:
- Straw
- Dry leaves
- Shredded cardboard
- Wood shavings
- Dried plant stalks
Can you place compost inside a greenhouse?
You can place a contained compost pile or compost bin inside a larger greenhouse, but there are several things to consider.
A compost pile takes up growing space and may add excess moisture to the air. Poorly managed compost can also smell, attract pests, or grow mold.
The pile should smell earthy rather than rotten or strongly like ammonia. A bad odor usually means the pile is too wet, too compacted, or contains too much nitrogen-rich material.
For many homesteaders, placing an active compost pile directly against the outside north wall may be more practical than putting it inside.
Compost heat is not constant
Compost does not produce the same amount of heat throughout the winter. A pile heats most actively when it is:
- Large enough to retain warmth
- Moist but not waterlogged
- Properly balanced
- Supplied with oxygen
- Actively decomposing
Once the material begins to finish composting, heat production slows. Think of compost as supplemental warmth rather than a dependable replacement for a heater.
4. Build a Manure Hotbed
A manure hotbed is one of the oldest methods for warming soil without electricity.
Fresh manure and bedding are placed beneath a growing bed. As the material decomposes, it produces heat that rises into the soil above it.
Horse manure mixed with straw has traditionally been used because it can heat quickly. Goat, sheep, rabbit, and poultry manure may also contribute to a hotbed mixture, although different materials heat at different rates.
This can be especially useful on a homestead where manure and soiled bedding are already available.
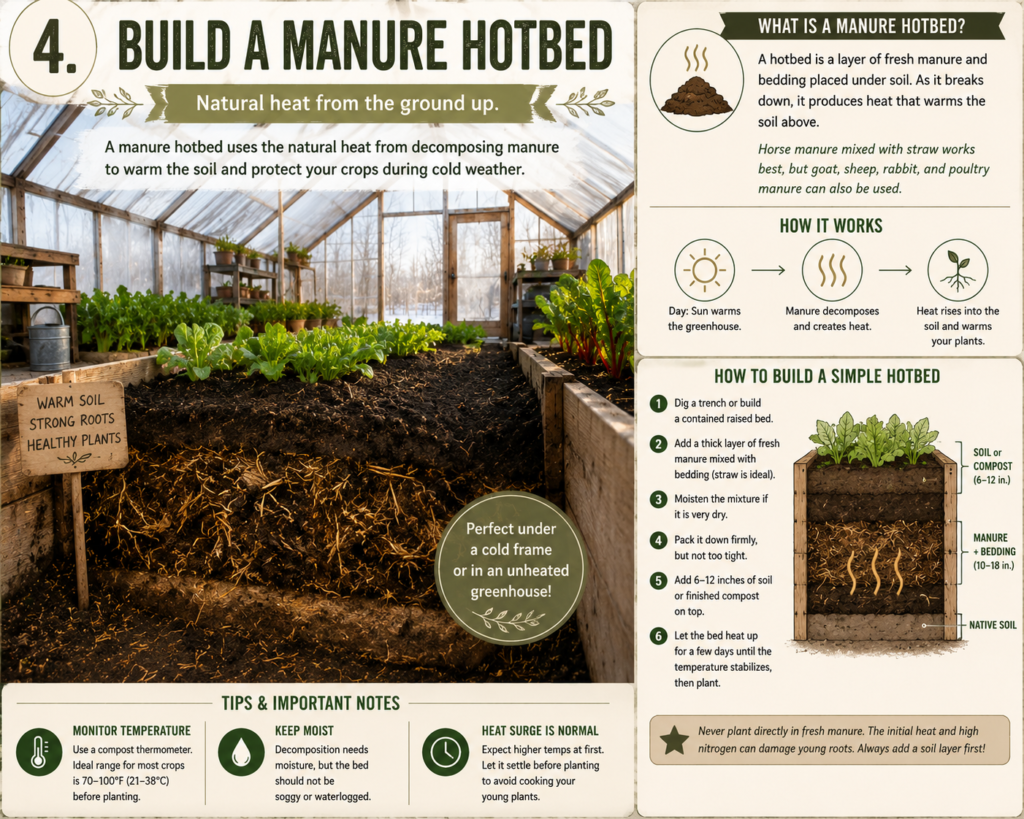
Basic hotbed setup
To build a simple manure hotbed:
- Dig a trench or create a contained raised bed.
- Add a thick layer of fresh manure mixed with bedding.
- Moisten the material if it is extremely dry.
- Pack it firmly without completely removing all airflow.
- Cover it with several inches of soil or finished compost.
- Allow the initial heat surge to settle before planting.
Do not plant directly into fresh manure. The initial decomposition process may create more heat than young roots can tolerate, and fresh manure may contain excessive nitrogen or salts.
Use a compost thermometer or soil thermometer to monitor the bed before adding plants.
A hotbed works especially well when paired with a cold frame. The manure warms the root zone from below while the clear cover captures sunlight from above. If you need inspiration for the structure itself, I rounded up 15 DIY cold frame ideas for winter gardening.
5. Block Wind and Insulate the Greenhouse
Keeping heat inside is often easier than producing more heat.
A greenhouse exposed to strong winter wind will lose warmth quickly through drafts, gaps, and the greenhouse covering itself.
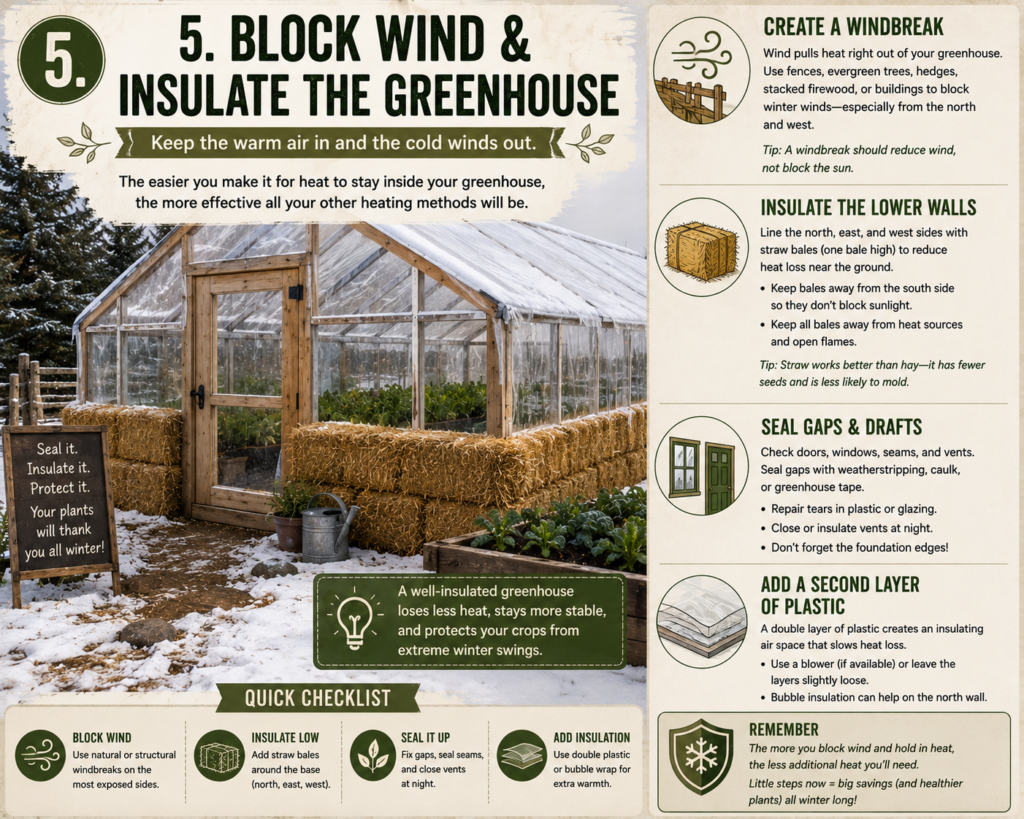
Create a windbreak
Fences, shrubs, barns, hedges, stacked firewood, or other structures can reduce the amount of wind hitting the greenhouse.
The windbreak should be placed on the side that receives the strongest winter winds, but it should not block the southern winter sun.
Do not completely seal the greenhouse between solid structures without considering snow drifting. Windbreaks can cause snow to collect heavily in certain areas.
Insulate the lower walls
Straw bales can provide temporary insulation around the bottom portion of a greenhouse.
One row of bales around the north, east, and west sides can help reduce heat loss near ground level. Be careful about placing bales across the south side, where they may block valuable winter sunlight.
Keep straw or hay away from:
- Woodstove pipes
- Open flames
- Electrical connections
- Hot heaters
- Other ignition sources
Straw generally works better than old hay for insulation because it contains fewer seeds and food residues. Both materials can hold moisture and mold if they remain wet.
Place bales where they have drainage and airflow rather than pressing wet material tightly against wooden greenhouse framing.
Seal obvious gaps
Before winter, inspect:
- Doors
- Windows
- Plastic seams
- Foundation edges
- Vent openings
- Torn greenhouse covering
You still need ventilation to control humidity, but uncontrolled drafts are different from intentional ventilation.
Repair tears and add weatherstripping around doors where needed.
Add a second layer of plastic
A double layer of greenhouse plastic creates an insulating air space between the two layers.
Commercial greenhouses often use a small blower to keep the layers inflated, but even an uninflated interior layer can reduce some heat loss when installed properly.
Bubble insulation may also be used on selected walls. Apply it where it will not block more sunlight than the insulation is worth—often the north wall first.
6. Add Protection Inside the Greenhouse
One of the most effective strategies is to create a smaller protected growing area inside the greenhouse.
Instead of trying to keep the entire structure warm, place hoops, frost cloth, or a miniature low tunnel directly over the plants.
This gives you two layers of protection:
- The outer greenhouse
- The inner row cover or low tunnel
The air trapped between the layers provides additional insulation.
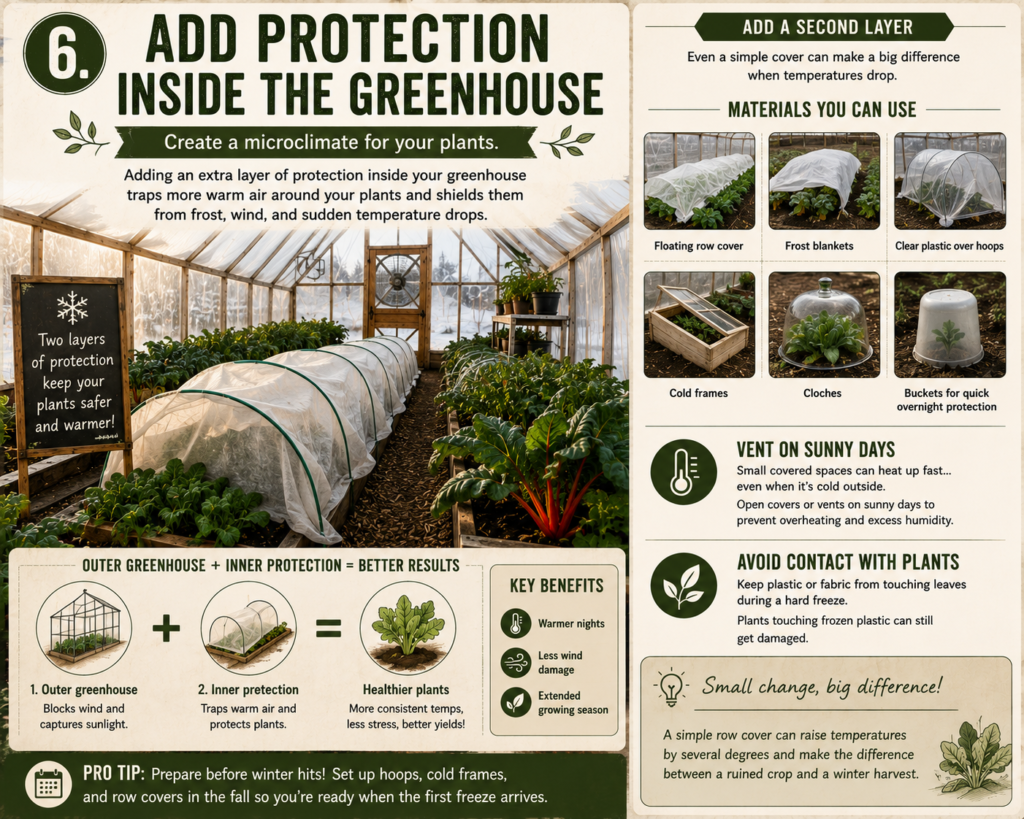
Materials you can use
Depending on the crop and temperature, you might use:
- Floating row cover
- Frost blankets
- Clear plastic over hoops
- Cold frames
- Cloches
- Upside-down buckets for temporary overnight protection
Avoid allowing plastic to rest directly against plant leaves during a hard freeze. Leaves touching frozen plastic may still suffer damage.
Open or vent inner tunnels on sunny days. A small covered space can become surprisingly hot even when the outdoor air is cold.
7. Choose Cold-Hardy Winter Crops
No amount of passive heating will make an unheated greenhouse suitable for tomatoes, peppers, cucumbers, or other heat-loving plants during a Western New York winter.
The best results come from combining season-extension methods with crops that naturally tolerate cold.
Good choices include:
- Spinach
- Kale
- Mâche
- Claytonia
- Arugula
- Winter lettuce varieties
- Green onions
- Parsley
- Carrots
- Beets
- Radishes
- Tatsoi
- Mizuna
- Swiss chard
Some crops tolerate frost better than others. Spinach and kale are generally much more forgiving than tender lettuce.
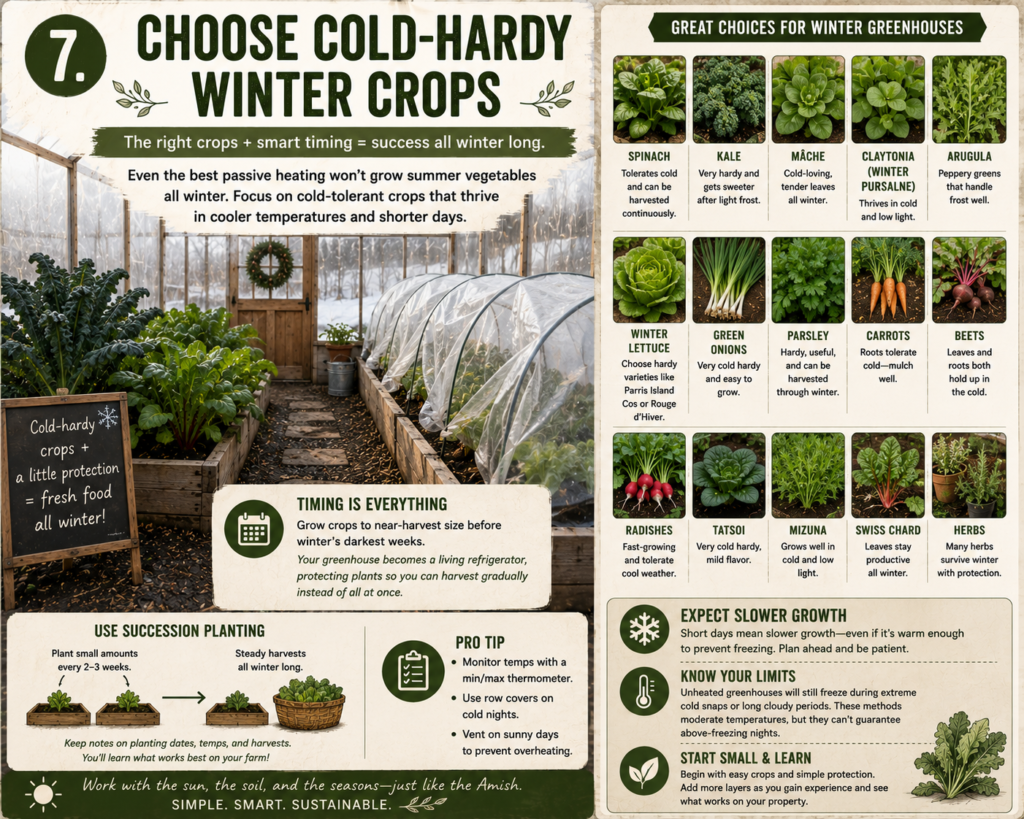
Grow plants before winter arrives
Winter greenhouse growing is different from summer gardening.
During the darkest part of winter, plant growth may slow dramatically because the days are short. Even when the greenhouse is warm enough to prevent freezing, plants may not receive enough light to grow quickly.
For that reason, many winter crops should be close to harvest size before the darkest weeks arrive.
The greenhouse then functions more like a living refrigerator. It protects the mature plants and allows you to harvest gradually through winter.
Use succession planting
Plant smaller amounts at intervals rather than sowing everything on the same day.
Succession planting can extend your harvest and prevent an entire bed from becoming ready at once. However, late plantings will grow much more slowly as daylight decreases.
Keep notes on planting dates, temperatures, and harvests. After one or two winters, you will have a much better idea of which timing works on your own property.
Combining Several Methods Works Best
No single barrel, compost pile, or straw bale will completely winterize a greenhouse.
The best system layers several methods together.
For example, you could:
- Place the greenhouse in full southern sun
- Seal drafts before winter
- Stack straw bales along the north and west walls
- Add water containers for thermal mass
- Build a manure hotbed
- Grow spinach and kale instead of tomatoes
- Cover the beds with frost cloth at night
Each layer provides a small amount of additional protection. Together, they can make a meaningful difference.
Know the Limitations of an Unheated Greenhouse
Passive methods help moderate temperatures, but they cannot guarantee that the greenhouse will remain above freezing during prolonged cloudy weather or extreme cold.
A small greenhouse can lose heat very quickly after sunset. This is especially true on clear, windy nights.
Use a minimum-and-maximum thermometer so you know what is actually happening inside. A remote temperature sensor can be even more useful because you can check the greenhouse without going outside during a storm.
Start with cold-tolerant crops and experiment before depending on the greenhouse for a large portion of your winter food.
Frequently Asked Questions
Can a greenhouse stay warm in winter without electricity?
A greenhouse can remain warmer than the outdoor air by capturing sunlight and blocking wind, but temperatures may still fall below freezing at night. Thermal mass, insulation, row covers, compost, and hotbeds can help reduce temperature swings.
Do water barrels keep a greenhouse from freezing?
Water barrels store daytime warmth and release it overnight. They can delay freezing and moderate temperature changes, but a few barrels may not prevent freezing during an extended cold snap.
Can I put straw bales around my greenhouse?
Yes. Straw bales can insulate the lower greenhouse walls, particularly on the north, east, and west sides. Keep them dry, avoid blocking southern sunlight, and keep them far away from fire or hot equipment.
Can I use old hay bales instead of straw?
Old hay can provide some insulation, but it tends to contain more seeds and organic material that may rot or attract pests. Both hay and straw can mold when they remain wet, so drainage and airflow are important.
Does compost really heat a greenhouse?
Active compost produces heat, but the amount varies throughout the decomposition process. Compost works best as one part of a larger system rather than the greenhouse’s only source of heat.
What is the best crop for an unheated winter greenhouse?
Spinach is one of the best choices because established plants tolerate cold and can be harvested repeatedly. Kale, mâche, claytonia, arugula, and selected winter lettuces are also good options.
Final Thoughts
Heating a greenhouse without electricity is less about finding one miracle heat source and more about working with the resources already available on the homestead.
Sunlight provides daytime warmth. Water, stone, and brick store some of that warmth. Compost and manure create heat as they decompose. Straw, greenhouse plastic, and row covers slow heat loss. Cold-hardy crops make the entire system more realistic.
These methods may not keep your greenhouse warm enough for summer vegetables all winter, but they can help protect spinach, kale, carrots, herbs, and other cool-season crops while reducing your dependence on electric heat.
Start with the materials you already have, monitor the temperatures carefully, and add additional layers of protection as you learn how your greenhouse behaves.
That simple, resourceful approach is exactly what homesteading is all about.


Post your Comment About This Product